close

Kylen Ayan

Interior Design

Color Psychology in Interior Design Explained

Color is more than decoration—it quietly shapes how a space feels, functions, and is remembered. In interior design, color psychology explores how hues influence mood, perception, and behavior. When chosen intentionally, colors can make rooms feel larger or cozier, calmer or more energetic, and even affect how people interact within a space.

This guide breaks down how color psychology works in interiors and how to use it effectively, without guesswork or trends that fade fast.

What Is Color Psychology in Interior Design?

Color psychology studies the emotional and mental responses people have to different colors. In interiors, it helps designers and homeowners:

  • Set the emotional tone of a room

  • Support the room’s purpose (rest, focus, socializing)

  • Influence perceived space, light, and temperature

  • Create visual harmony and balance

While personal preference and culture matter, many color responses are surprisingly consistent across people.

Warm Colors and Their Effects

Warm colors tend to energize spaces and draw people in. They visually advance, making rooms feel more intimate.

Red

Red is bold, stimulating, and attention-grabbing. It increases heart rate and appetite, which is why it’s often used in dining areas.

Best used for:

  • Dining rooms

  • Accent walls

  • Social spaces

Use sparingly—too much red can feel overwhelming.

Orange

Orange combines the energy of red with the friendliness of yellow. It encourages conversation and creativity.

Best used for:

  • Playrooms

  • Creative studios

  • Casual living areas

Muted or earthy oranges are easier to live with long-term.

Yellow

Yellow is associated with optimism and light. It can make darker rooms feel brighter and more welcoming.

Best used for:

  • Kitchens

  • Breakfast nooks

  • Entryways

Soft or warm yellows work better than harsh, neon tones.

Cool Colors and Their Effects

Cool colors are calming and visually recede, making spaces feel more open and restful.

Blue

Blue promotes calm, focus, and clarity. It’s one of the most versatile colors in interior design.

Best used for:

  • Bedrooms

  • Bathrooms

  • Home offices

Darker blues add sophistication, while lighter shades feel airy.

Green

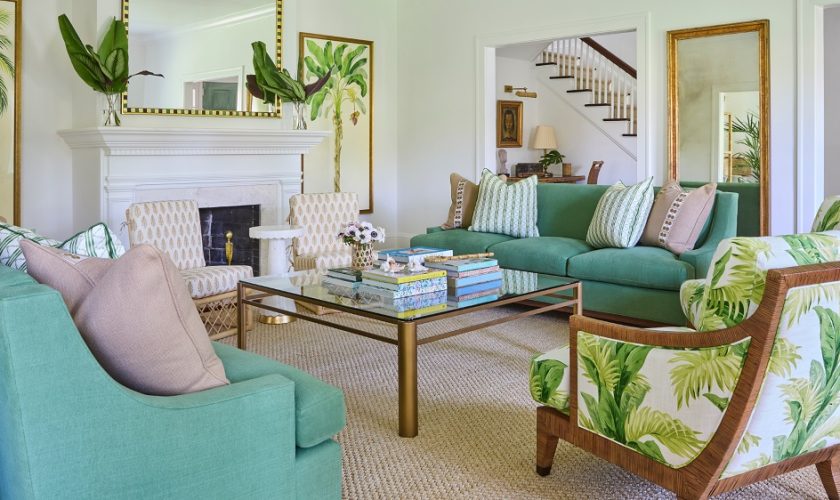
Green represents balance and nature. It’s easy on the eyes and works well in almost any room.

Best used for:

  • Living rooms

  • Bedrooms

  • Reading spaces

Earthy greens create comfort; cooler greens feel fresh and modern.

Purple

Purple is associated with creativity and luxury. Its effect depends heavily on the shade.

Best used for:

  • Accent areas

  • Creative spaces

  • Statement rooms

Soft lavenders feel calming; deep purples feel dramatic and rich.

Neutral Colors: The Emotional Anchors

Neutrals don’t mean boring. They provide balance and let other elements shine.

White

White suggests cleanliness and simplicity. It reflects light and makes rooms feel larger.

Use with texture and contrast to avoid a sterile look.

Gray

Gray is modern and calming but can feel cold if overused.

Pair with:

  • Warm wood tones

  • Soft textiles

  • Accent colors

Beige and Taupe

These warm neutrals create comfort and timelessness.

Ideal for:

  • Living rooms

  • Bedrooms

  • Open-plan spaces

How Color Affects Space and Light

Color changes how we perceive room dimensions and brightness:

  • Light colors make small rooms feel larger

  • Dark colors add depth and coziness

  • Cool tones visually expand walls

  • Warm tones make spaces feel more intimate

Natural and artificial lighting will always influence how a color appears, so testing samples in the actual space is essential.

Choosing the Right Color for Each Room

A practical approach is to match color mood with room function:

  • Bedrooms: blues, greens, soft neutrals

  • Living rooms: warm neutrals, muted greens, soft blues

  • Kitchens: whites, yellows, warm grays

  • Bathrooms: blues, whites, light greens

  • Home offices: blues, greens, neutral backdrops

Accent colors can add personality without overpowering the room.

Common Mistakes to Avoid

  • Choosing colors without testing them in real lighting

  • Overusing bold colors on all walls

  • Ignoring undertones in neutrals

  • Following trends instead of function

  • Forgetting how adjacent rooms interact

Color works best when it supports both emotion and practicality.

FAQs

How does color psychology influence mood in a home?

Colors subtly affect emotions such as calmness, energy, and comfort, shaping how people feel and behave in a space.

Are color psychology effects the same for everyone?

While general responses are common, personal experiences, culture, and preferences can influence how colors are perceived.

Can dark colors work in small rooms?

Yes, when used strategically. Dark colors can add depth and sophistication, especially with good lighting and contrast.

How many colors should be used in one room?

A balanced approach is best—typically one main color, one secondary color, and one accent.

Do neutral colors have psychological effects?

Yes. Neutrals can create calm, stability, and openness, depending on their warmth and undertones.

How do I test a color before committing?

Apply sample patches on multiple walls and observe them at different times of day under natural and artificial light.

Should color choices follow trends or personal taste?

Personal comfort should always come first. Trends can inspire, but timeless colors aligned with function age better.

read more
Roofing

Roof Maintenance Tips for Long-Term Protection

Your roof is your home’s first line of defense against sun, rain, wind, and snow. With consistent care and smart upkeep, it can last years—sometimes decades—longer than neglected roofs. Below are practical, proven roof maintenance tips that help preserve structural integrity, prevent costly repairs, and protect your investment over the long haul.

Why Regular Roof Maintenance Matters

Routine maintenance isn’t just about appearances. It’s about early detection and damage prevention. Small issues—like a cracked shingle or clogged gutter—can quietly escalate into leaks, rot, mold growth, or insulation damage.

Key benefits include:

  • Extended roof lifespan

  • Lower repair and replacement costs

  • Improved energy efficiency

  • Better protection during severe weather

Inspect Your Roof at Least Twice a Year

A visual inspection in spring and fall helps catch seasonal wear before it worsens. You don’t need to climb onto the roof every time—binoculars from the ground can work for basic checks.

Look out for:

  • Missing, cracked, or curling shingles

  • Loose or rusted flashing

  • Sagging areas or uneven lines

  • Granules collecting in gutters

If anything looks off, address it quickly or call a professional for a closer look.

Keep Gutters and Downspouts Clear

Clogged gutters force water to back up under shingles and along fascia boards, leading to leaks and rot.

Best practices:

  • Clean gutters at least twice a year

  • Remove leaves, twigs, and debris after storms

  • Ensure downspouts direct water away from the foundation

This simple habit protects both your roof and your home’s structure.

Trim Overhanging Tree Branches

Branches that hang too close to the roof can scrape shingles, drop debris, and provide a pathway for pests.

Benefits of trimming:

  • Reduces physical damage during high winds

  • Limits moisture buildup from trapped leaves

  • Prevents animals from accessing the roof

Aim to keep branches at least 6–10 feet away from the roof surface.

Address Minor Repairs Immediately

Small problems rarely stay small. A single damaged shingle can allow moisture to seep into the underlayment and decking.

Common quick fixes include:

  • Replacing damaged or missing shingles

  • Resealing loose flashing

  • Securing exposed nails

  • Repairing small leaks around vents or chimneys

Timely repairs can save thousands in future restoration costs.

Ensure Proper Roof Ventilation

Poor ventilation traps heat and moisture in the attic, accelerating shingle aging and encouraging mold growth.

Signs of ventilation issues:

  • Excessive attic heat

  • Ice dams in winter

  • High energy bills

  • Musty odors indoors

Balanced intake and exhaust vents help regulate temperature and moisture year-round

Remove Moss, Algae, and Debris Safely

Moss and algae retain moisture, which can weaken roofing materials over time. Avoid pressure washing—it can strip protective layers.

Safer options:

  • Use gentle roof-cleaning solutions

  • Install zinc or copper strips to inhibit regrowth

  • Schedule professional cleaning if buildup is extensive

Keeping the surface clean preserves both performance and appearance.

Schedule Professional Roof Inspections

Even with diligent DIY care, a professional inspection every 2–3 years adds an extra layer of protection. Experts spot issues invisible from the ground and assess structural components more thoroughly.

Professional inspections are especially valuable:

  • After severe storms

  • Before buying or selling a home

  • When the roof approaches mid-life

FAQs

How long should a well-maintained roof last?

With proper maintenance, many asphalt shingle roofs last 20–30 years, while metal and tile roofs can last significantly longer.

Can I inspect my roof myself, or should I always hire a professional?

Homeowners can perform basic visual checks, but professional inspections are recommended periodically for a more detailed assessment.

What’s the biggest cause of premature roof failure?

Neglected maintenance—especially unrepaired leaks and poor ventilation—is a leading cause of early roof replacement.

Is roof maintenance different for older homes?

Yes. Older roofs often require more frequent inspections and quicker repairs because materials may already be nearing the end of their lifespan.

How do I know if a roof leak is serious?

Any leak is serious. Even small water stains can indicate hidden moisture damage that worsens over time.

Does roof maintenance improve energy efficiency?

Absolutely. A well-maintained, properly ventilated roof helps regulate indoor temperatures and reduces heating and cooling costs.

What time of year is best for roof maintenance?

Spring and fall are ideal, as weather conditions are milder and damage from extreme seasons is easier to spot.

read more
Furniture

Modern Furniture Trends for Contemporary Homes

Modern furniture has evolved far beyond simple clean lines and neutral colors. Today’s contemporary homes reflect a blend of functionality, personality, and sustainability, creating spaces that feel intentional yet lived-in. Whether you’re redesigning a single room or furnishing an entire home, understanding current furniture trends can help you make choices that remain stylish and practical for years.

Emphasis on Minimalism With Warmth

Minimalism continues to dominate modern interiors, but it has shifted toward a softer, more inviting aesthetic. Instead of stark, cold spaces, contemporary homes now focus on clean silhouettes paired with warm textures.

Key characteristics include:

  • Low-profile sofas and streamlined chairs

  • Neutral palettes enhanced with earthy tones

  • Natural materials like wood, leather, and stone

This approach balances simplicity with comfort, making rooms feel calm without appearing sterile.

Multifunctional Furniture for Smart Living

As homes become more dynamic, furniture is expected to do more than one job. Multifunctional designs are especially popular in urban and smaller living spaces.

Common examples:

  • Sofas that convert into beds

  • Coffee tables with hidden storage

  • Modular shelving systems that adapt over time

These pieces help homeowners maximize space while maintaining a modern, uncluttered look.

Sustainable and Eco-Conscious Choices

Sustainability is no longer a niche preference—it’s a defining feature of modern furniture trends. Homeowners are increasingly drawn to pieces that reflect environmental responsibility without sacrificing design.

Popular sustainable elements include:

  • Reclaimed or responsibly sourced wood

  • Furniture made with recycled metals or fabrics

  • Low-VOC finishes and natural upholstery materials

Beyond eco-benefits, these choices often bring unique textures and character into contemporary interiors.

Bold Shapes and Sculptural Designs

While minimalism sets the foundation, bold furniture pieces are being used as focal points. Sculptural forms add visual interest and artistic flair to modern homes.

Design elements gaining popularity:

  • Curved sofas and rounded armchairs

  • Asymmetrical tables and shelving

  • Statement lighting paired with expressive furniture

These designs blur the line between furniture and art, allowing homeowners to express individuality.

Mixing Textures and Materials

Modern furniture trends encourage thoughtful contrast. Instead of matching everything, designers now blend different materials to create depth and dimension.

Common material combinations:

  • Wood with metal accents

  • Glass paired with stone or marble

  • Soft fabrics contrasted with matte or polished finishes

This layering effect keeps contemporary spaces visually engaging while remaining cohesive.

Technology-Integrated Furniture

Technology is seamlessly finding its way into modern furniture design. Rather than appearing futuristic or intrusive, tech features are now subtly integrated.

Examples include:

  • Beds with built-in charging ports

  • Desks designed for cable management

  • Smart tables with wireless charging surfaces

These innovations support modern lifestyles without disrupting the clean aesthetic of contemporary homes.

Personalization Over Perfection

Modern furniture trends are moving away from showroom-perfect interiors. Instead, there’s a growing appreciation for spaces that feel curated and personal.

Homeowners are embracing:

  • Custom or made-to-order furniture

  • Vintage pieces mixed with modern designs

  • Furniture that reflects lifestyle rather than strict trends

This shift allows contemporary homes to feel authentic, comfortable, and uniquely human.

Frequently Asked Questions

What defines modern furniture in contemporary homes?

Modern furniture is defined by clean lines, functional design, and minimal ornamentation, often paired with natural materials and thoughtful details.

Is modern furniture suitable for small spaces?

Yes, modern furniture often emphasizes multifunctional and space-saving designs, making it ideal for apartments and compact homes.

Can modern furniture feel warm and cozy?

Absolutely. By incorporating soft textures, warm wood tones, and layered lighting, modern furniture can feel both stylish and inviting.

How do I mix modern furniture with existing décor?

Focus on balance. Pair modern pieces with neutral colors, and use textures or accent items to bridge old and new styles.

Are bold furniture pieces risky in contemporary homes?

Not if used intentionally. One or two statement pieces can elevate a space without overwhelming it.

What materials last longest in modern furniture?

Solid wood, high-quality metals, and durable upholstery fabrics tend to offer the best longevity when properly maintained.

How often do modern furniture trends change?

Core principles stay consistent, but details like shapes, materials, and colors evolve every few years, allowing flexibility without frequent replacements.

read more
Flooring

Flooring: A Practical Guide to Choosing the Right Surface for Your Space

Flooring is more than a surface you walk on—it sets the tone of a room, influences comfort, and affects long-term maintenance costs. Whether you’re building new or renovating, the right flooring choice balances durability, style, and budget while fitting how you actually live.

Why Flooring Choice Matters

The floor is one of the most used elements in any building. A smart choice can improve resale value, reduce upkeep, and make daily life easier.

Key factors flooring impacts:

  • Aesthetics: Color, texture, and pattern define the room’s mood

  • Comfort: Warmth underfoot, sound absorption, and softness

  • Durability: Resistance to scratches, moisture, and wear

  • Maintenance: Cleaning effort and long-term care

  • Cost: Installation plus lifetime ownership costs

Common Types of Flooring

Each flooring type has strengths and trade-offs. Understanding them helps avoid costly mistakes later.

Hardwood Flooring

Hardwood remains a classic for a reason. It offers natural beauty and can last decades when properly maintained.

Pros

  • Timeless appearance

  • Can be refinished multiple times

  • Boosts property value

Cons

  • Sensitive to moisture

  • Higher upfront cost

  • Can scratch under heavy use

Laminate Flooring

Laminate mimics wood or stone while being more budget-friendly.

Pros

  • Affordable

  • Easy to install

  • Scratch-resistant surface

Cons

  • Cannot be refinished

  • Less authentic look up close

  • Moisture can damage seams

Vinyl Flooring (LVP & LVT)

Luxury Vinyl Plank (LVP) and Luxury Vinyl Tile (LVT) are popular for modern homes.

Pros

  • Water-resistant or waterproof

  • Comfortable underfoot

  • Wide range of designs

Cons

  • Can fade under direct sunlight

  • Lower resale value than hardwood

Tile Flooring

Tile is a go-to choice for wet areas and high-traffic zones.

Pros

  • Extremely durable

  • Water and stain resistant

  • Ideal for kitchens and bathrooms

Cons

  • Cold and hard underfoot

  • Grout requires maintenance

Carpet Flooring

Carpet prioritizes comfort and warmth.

Pros

  • Soft and quiet

  • Great insulation

  • Wide color choices

Cons

  • Stains easily

  • Traps dust and allergens

  • Shorter lifespan

Engineered Wood Flooring

Engineered wood combines real wood veneer with a layered core.

Pros

  • More moisture-resistant than solid wood

  • Real wood appearance

  • Suitable for basements

Cons

  • Limited refinishing options

  • Mid-to-high price range

How to Choose the Right Flooring

Choosing flooring isn’t just about looks. Match the material to the room’s function.

Consider these questions:

  • Is the area exposed to moisture?

  • How much foot traffic will it get?

  • Do you have pets or kids?

  • Is sound control important?

  • What’s your realistic maintenance tolerance?

Room-by-Room Recommendations

  • Living Rooms: Hardwood, laminate, or LVP

  • Bedrooms: Carpet or engineered wood

  • Kitchens: Tile or waterproof vinyl

  • Bathrooms: Tile or waterproof vinyl

  • Basements: Engineered wood or vinyl

Installation and Maintenance Basics

Proper installation extends flooring life just as much as material choice.

Installation tips

  • Always prepare and level the subfloor

  • Acclimate materials before installation

  • Use professional installers for complex layouts

Maintenance essentials

  • Sweep or vacuum regularly

  • Clean spills immediately

  • Use furniture pads to prevent scratches

Sustainability and Eco-Friendly Flooring

If sustainability matters to you, several options reduce environmental impact:

  • Bamboo flooring

  • Cork flooring

  • Reclaimed hardwood

  • Low-VOC vinyl and finishes

These choices can improve indoor air quality while supporting responsible sourcing.

FAQs About Flooring

1. What flooring lasts the longest in a home?

Tile and properly maintained hardwood often have the longest lifespans, sometimes exceeding 30 years.

2. Is vinyl flooring suitable for resale value?

Vinyl is practical and attractive, but it typically adds less resale value than real wood or tile.

3. Can flooring be installed over existing floors?

In many cases, yes—especially with laminate or vinyl—but subfloor condition is critical.

4. Which flooring is best for people with allergies?

Hard surfaces like tile, vinyl, or hardwood are better since they don’t trap allergens.

5. How often should flooring be replaced?

It depends on the material and use, ranging from 10 years for carpet to 30+ years for tile or wood.

6. Does underlayment really matter?

Yes. Underlayment improves comfort, sound control, and moisture protection.

7. What flooring works best with radiant heating?

Tile and engineered wood perform best with radiant heat systems.

read more
Decor Tips

Color Palette Ideas for Harmonious Homes

Creating a harmonious home starts with the right color palette. Colors influence mood, perception of space, and even how connected a home feels. When thoughtfully combined, they bring balance, comfort, and personality into every room. Below are practical and timeless color palette ideas that help you design interiors that feel cohesive rather than chaotic.

Understanding Harmony in Home Colors

Color harmony is about visual balance. It doesn’t mean using one color everywhere—it means selecting shades that naturally work together.

Key principles of harmonious color design include:

  • Consistency across spaces without making rooms feel repetitive
  • Balanced contrast to avoid dullness or visual overload
  • Purpose-driven colors based on room function and lighting

A harmonious palette often blends a dominant color, a secondary support shade, and a subtle accent.

Neutral Color Palettes for Timeless Balance

Neutral palettes are the backbone of many harmonious homes. They create a calm foundation and adapt easily to changing décor trends.

Popular neutral combinations include:

  • Warm beige + soft white + muted taupe
  • Light gray + ivory + charcoal accents
  • Greige (gray-beige) + cream + natural wood tones

Neutrals are especially effective in open-plan homes, helping multiple rooms flow together seamlessly.

Warm Color Palettes for Cozy Living Spaces

Warm colors make spaces feel inviting and grounded. They work beautifully in areas meant for relaxation and socializing.

Effective warm palette ideas:

  • Terracotta + sand + soft clay
  • Muted mustard + warm white + walnut brown
  • Soft blush + cream + copper accents

These palettes enhance comfort, especially in living rooms, dining spaces, and bedrooms.

Cool Color Palettes for Calm and Clarity

Cool colors bring a sense of freshness and tranquility. They’re ideal for spaces where focus and calm matter most.

Balanced cool combinations include:

  • Soft blue + pale gray + crisp white
  • Sage green + off-white + light oak
  • Muted teal + stone gray + brushed metal accents

Cool palettes are excellent for home offices, bathrooms, and minimalist interiors.

Earth-Inspired Palettes for Natural Harmony

Earth tones connect interiors with the outdoors, promoting warmth and stability without overwhelming the senses.

Common earth-tone mixes:

  • Olive green + clay brown + linen white
  • Stone gray + sand + weathered wood
  • Rust + muted green + soft beige

These palettes shine in homes that emphasize natural materials, plants, and organic textures.

Using Accent Colors Without Disrupting Balance

Accent colors add personality, but restraint is key to maintaining harmony.

Best practices for accents:

  • Use accents in small doses (pillows, art, rugs)
  • Choose shades already present in adjacent rooms
  • Keep accents slightly muted, not overly saturated

Popular accent choices include navy, forest green, burnt orange, and deep plum.

Creating Flow Between Rooms

A harmonious home feels connected, even when rooms serve different purposes.

To maintain flow:

  • Repeat one core color throughout the home
  • Shift shade intensity, not hue, between rooms
  • Use similar undertones (warm or cool) across palettes

This approach allows variety while preserving unity.

FAQs

What is the best color palette for a small home?

Light neutrals paired with soft accents work best, as they reflect light and make spaces feel larger and more open.

How many colors should a harmonious palette include?

Most balanced palettes use three to five colors, including neutrals and accents.

Can warm and cool colors be mixed in one home?

Yes, as long as there is a unifying neutral or consistent undertone to tie them together.

How do I choose colors based on natural light?

Rooms with limited sunlight benefit from warmer tones, while bright rooms can handle cooler shades comfortably.

Are bold colors bad for harmonious interiors?

Not at all. Bold colors work well when used intentionally and balanced with calmer supporting tones.

Should ceilings and walls always match?

No. Slightly lighter ceilings often enhance height and openness without breaking harmony.

How often should a home color palette be updated?

A strong base palette can last for years. Updating accents every season keeps the space feeling fresh without repainting.

read more
Architecture

Climate-Responsive Architectural Design Strategies

Climate-responsive architecture is about designing buildings that work with local climate conditions rather than against them. As energy costs rise and climate variability intensifies, architects and planners are increasingly focused on solutions that reduce environmental impact while improving comfort, durability, and performance. This approach blends traditional wisdom with modern technology to create spaces that are efficient, resilient, and human-centered.

Understanding Climate-Responsive Design

Climate-responsive design tailors architectural decisions to temperature patterns, humidity, wind, rainfall, and solar exposure specific to a location. Instead of relying heavily on mechanical heating and cooling, buildings are shaped, oriented, and constructed to naturally regulate indoor conditions.

Key goals include:

  • Minimizing energy consumption

  • Enhancing thermal and visual comfort

  • Reducing carbon emissions

  • Increasing building longevity

This philosophy treats climate as a design partner, not a problem to overcome.

Site Analysis and Building Orientation

One of the most influential decisions in climate-responsive architecture happens before construction begins.

Effective site planning considers:

  • Solar path to maximize winter heat and reduce summer gain

  • Prevailing winds for natural ventilation

  • Topography and vegetation to manage heat, shade, and water flow

Proper orientation alone can significantly reduce energy demand, especially in extreme climates.

Passive Design Strategies

Passive design forms the backbone of climate-responsive architecture. These strategies operate without mechanical systems, relying instead on physics and material behavior.

Thermal Mass and Insulation

Materials like concrete, brick, and stone can store heat during the day and release it at night, stabilizing indoor temperatures. When combined with high-quality insulation, thermal mass reduces the need for artificial heating and cooling.

Natural Ventilation

Cross-ventilation, stack ventilation, and operable windows use air pressure and temperature differences to keep interiors cool and fresh. This is particularly effective in warm and temperate climates.

Solar Control and Shading

Well-designed shading devices such as:

  • Overhangs

  • Louvers

  • Screens and pergolas

help block high-angle summer sun while allowing lower winter sun to enter, balancing daylight and heat gain.

Climate-Appropriate Building Materials

Material choice has a direct impact on thermal performance and environmental footprint.

Climate-responsive material selection focuses on:

  • Local availability to reduce transportation emissions

  • Low embodied energy materials

  • Moisture resistance in humid regions

  • High reflectivity in hot climates to reduce heat absorption

Using regionally suited materials often improves both sustainability and cultural relevance.

Integrating Landscape and Water Elements

Landscape design plays a critical role in moderating microclimates around buildings.

Effective strategies include:

  • Deciduous trees for seasonal shading

  • Green roofs and walls to reduce heat islands

  • Water bodies for evaporative cooling in dry climates

These elements don’t just improve performance; they enhance well-being and visual quality.

Technology-Enhanced Climate Responsiveness

While passive strategies come first, smart technologies refine performance.

Examples include:

  • Adaptive façades that respond to sunlight and temperature

  • Building management systems optimizing energy use in real time

  • High-performance glazing with low heat transfer

When technology supports, rather than replaces, passive principles, buildings become both efficient and resilient.

Learning from Vernacular Architecture

Traditional architecture often evolved through centuries of climate adaptation. Courtyards, thick walls, narrow streets, and elevated structures are not stylistic accidents but responses to environmental realities.

Modern climate-responsive design frequently reinterprets these ideas, combining time-tested concepts with contemporary needs and standards.

Benefits Beyond Energy Efficiency

Climate-responsive architecture offers advantages that extend well beyond reduced utility bills.

Key benefits include:

  • Improved indoor air quality

  • Enhanced occupant comfort and productivity

  • Lower maintenance costs

  • Greater resilience to climate extremes

These outcomes make climate-responsive design not just an environmental choice, but a long-term economic and social investment.

Conclusion

Climate-responsive architectural design represents a shift from reactive to adaptive thinking. By aligning buildings with their environmental context, architects can create spaces that are comfortable, efficient, and sustainable by design. As climate challenges grow more complex, these strategies are no longer optional—they are essential.

Frequently Asked Questions (FAQs)

1. How does climate-responsive architecture differ from green building design?

Climate-responsive design focuses specifically on local climate adaptation, while green building encompasses broader sustainability metrics such as materials, water use, and certifications.

2. Is climate-responsive design suitable for urban environments?

Yes, with careful planning, strategies like shading, natural ventilation, and green roofs can be effectively applied even in dense urban settings.

3. Does climate-responsive architecture increase construction costs?

Initial costs may be slightly higher, but long-term savings from reduced energy use and maintenance typically outweigh the upfront investment.

4. Can existing buildings be retrofitted to become climate-responsive?

Many strategies, such as improved insulation, shading devices, and ventilation upgrades, can be applied during renovations.

5. How does climate-responsive design handle extreme weather events?

By improving thermal stability, natural ventilation, and material durability, these buildings often perform better during heatwaves, cold snaps, and power outages.

6. What role does climate data play in the design process?

Accurate climate data informs decisions on orientation, materials, shading, and ventilation, making it a foundational element of the design process.

7. Are climate-responsive buildings dependent on occupant behavior?

Occupant interaction, such as opening windows or adjusting shading, can enhance performance, but well-designed buildings remain effective even with minimal user input.

read more
Bathroom

Bathroom Design: Function, Comfort, and Style in One Space

A bathroom is far more than a utilitarian room. It’s where mornings begin, evenings wind down, and daily routines quietly shape comfort and well-being. A thoughtfully designed bathroom balances functionality, hygiene, and aesthetics, creating a space that feels both practical and restorative.

Whether you’re planning a full renovation or simple upgrades, understanding bathroom essentials helps you make smarter choices that last.

The Core Purpose of a Bathroom

At its foundation, a bathroom serves three key purposes:

  • Personal hygiene – bathing, handwashing, grooming

  • Comfort and privacy – a calm, secure personal space

  • Health and sanitation – proper water use and waste management

Modern bathrooms go beyond necessity, often acting as mini wellness zones inside the home.

Types of Bathrooms in Homes

Not all bathrooms are designed the same. Each type serves a different role depending on location and usage.

Full Bathroom

A full bathroom typically includes:

  • Toilet

  • Sink

  • Shower

  • Bathtub

This is the most common bathroom type in family homes.

Half Bathroom (Powder Room)

Usually found near living areas, a half bathroom includes:

  • Toilet

  • Sink

It’s designed for guests and quick use.

Ensuite Bathroom

Connected directly to a bedroom, this bathroom offers:

  • Privacy

  • Convenience

  • Higher design flexibility

Ensuite bathrooms often feature upgraded finishes and layouts.

Wet Bathroom

In a wet bathroom:

  • The entire room is waterproofed

  • Shower areas are open without barriers

This style is popular in compact homes and modern designs.

Essential Bathroom Fixtures and Features

A well-functioning bathroom relies on a few core components.

Plumbing Fixtures

Key fixtures include:

  • Toilet – water-efficient models reduce utility costs

  • Sink/Vanity – combines storage with daily use

  • Shower or bathtub – selected based on space and lifestyle

Storage Solutions

Smart storage prevents clutter and improves usability:

  • Wall-mounted cabinets

  • Vanity drawers

  • Recessed shelves

  • Mirror cabinets

Lighting

Good lighting is essential for both safety and comfort:

  • Task lighting near mirrors

  • Ambient lighting for overall brightness

  • Accent lighting for visual warmth

Bathroom Design Considerations

Designing a bathroom requires balancing appearance with long-term practicality.

Space Optimization

For smaller bathrooms:

  • Use wall-mounted fixtures

  • Choose sliding or pocket doors

  • Opt for light-colored finishes

Materials and Finishes

Durable materials matter in high-moisture areas:

  • Ceramic or porcelain tiles

  • Water-resistant paint

  • Stone or composite countertops

Ventilation

Proper ventilation:

  • Prevents mold and mildew

  • Protects walls and ceilings

  • Improves air quality

Exhaust fans or well-placed windows are essential.

Modern Bathroom Trends

Bathrooms continue to evolve with changing lifestyles and technology.

Popular trends include:

  • Minimalist layouts with clean lines

  • Walk-in showers with frameless glass

  • Smart fixtures like touchless faucets

  • Natural elements such as wood textures and stone finishes

  • Neutral color palettes paired with warm lighting

These trends emphasize relaxation, sustainability, and ease of maintenance.

Maintenance and Hygiene Tips

Keeping a bathroom clean and functional doesn’t require heavy effort when done consistently.

Best practices include:

  • Wiping surfaces daily to prevent buildup

  • Using non-abrasive cleaners on fixtures

  • Checking for leaks regularly

  • Cleaning grout and drains monthly

Regular care extends the life of bathroom components and maintains a fresh appearance.

Why Bathroom Design Impacts Home Value

A well-designed bathroom:

  • Increases property value

  • Improves daily living comfort

  • Attracts potential buyers

Bathrooms are among the most scrutinized spaces during property evaluations, making thoughtful upgrades a smart investment.

Frequently Asked Questions (FAQ)

1. What is the ideal size for a bathroom?

There is no universal ideal size, but comfort and functionality matter more than square footage. Even small bathrooms can feel spacious with smart layouts.

2. How often should a bathroom be renovated?

Most bathrooms last 10–15 years before requiring major updates, depending on material quality and usage.

3. Which flooring is best for bathrooms?

Water-resistant flooring such as porcelain tile, ceramic tile, or vinyl is best suited for bathroom environments.

4. Is a bathtub necessary in every home?

Not necessarily. Homes with limited space or single occupants may benefit more from a spacious shower instead of a bathtub.

5. How can I make a small bathroom feel larger?

Using mirrors, light colors, glass shower panels, and wall-mounted fixtures can visually expand the space.

6. What lighting color temperature works best in bathrooms?

Neutral to warm lighting (around 3000–4000K) provides clarity without feeling harsh.

7. Are smart bathroom fixtures worth it?

Smart fixtures improve hygiene, water efficiency, and convenience, making them a valuable upgrade for many households.

read more
Flooring

Enhancing Your Outdoor Space with Waterproof Microcement Flooring

When Laura transformed her rain-soaked patio into a seamless, slip‑resistant terrace with waterproof microcement, she didn’t just gain an elegant outdoor room—she unlocked year‑round usability, cleaner lines around drains and thresholds, and a durable finish that shrugs off British weather. This guide shows you how to achieve the same: from planning falls, drainage routes and substrate checks, to building a proven waterproof layer system with correct cure windows; from selecting UV‑stable colours, textures and non‑slip finishes that suit dining zones, paths, balconies and pool surrounds, to a clear installation workflow, tools list and when to call a specialist. You’ll also find practical care routines, repair tips, realistic UK costs and resealing schedules, helping you create a safe, beautiful, long‑lasting outdoor surface with confidence—backed by transparent methods and quality controls for results you can trust.

Plan the Perfect Outdoor Microcement Setup: Site, Substrate, Drainage

You don’t get a second shot with exterior finishes, so map the space like a pro. Start by splitting the area into clear use zonesdining, lounging, paths, and pool surrounds—then sketch a scaled plan with accurate m² measurements. Next, verify surface falls using a level and aim for a reliable 1.5–2% slope leading away from the building; for example, a 4 m depth needs a 60–80 mm drop. Don’t guess where water goes—map water exit points (think linear drains, soakaways, gulleys) and confirm they can actually cope during heavy rain. Then interrogate the substrate: identify cracks, hollow sounds, or loose tiles, and ensure you’re on a rigid base such as concrete, screed, or stable tiles—not timber. Log moisture readings (RH ≤ 75% for screeds unless the system says otherwise), and note the date—installers and warranties love records. Mark every movement/expansion joint and plan to honour or mirror them in the microcement finish to prevent telegraphing. Finally, clock the exposuresfull sun, shade, wind—because they determine colour choice, curing schedule, and even sealer selection for a truly waterproof microcement result.

Case studies that nail the brief: • 8 m² balcony (single fall) • 20 m² patio (dual fall + linear drain) • 35 m² pool surround (perimeter falls to channel). In practice, that means precise gradient control, correct drain placement, and a verified substrate integrity checklist before any basecoat goes down. This is how you achieve a durable, slip-resistant, and genuinely low-maintenance outdoor microcement floor that looks sharp and survives British weather without sulking at the first downpour.

Build a Reliable Waterproof System: Layers, Coverage, and Curing Windows

For a bulletproof outdoor install, commit to one manufacturer’s complete waterproof system from primer to sealer — mixing brands is how projects fail. Below is a tight, field-tested stack for waterproof microcement outdoors, with timings that keep momentum without risking delamination. Work clean, and respect the curing windows; cutting corners shows up later as blisters, chalking or edge failures.

  1. Primer (outdoor-rated): 1 coat at roughly 8–12 m²/L. Purpose: adhesion promotion on concrete, screed, or stable tiles. Minimum cure to next step: 2–4 hours.
  2. Liquid waterproof membrane: 2 coats, each at about 1.0–1.5 m²/kg/coat. Purpose: block water ingress and bridge hairline movement. Minimum cure: 12–24 hours before reinforcement.
  3. Base coat + mesh reinforcement: 1–1.5 mm with alkali‑resistant mesh embedded, coverage around 1.0–1.5 kg/m². Purpose: control micro‑cracking and stabilise the field. Minimum cure: 3–6 hours.
  4. Finish microcement (2 coats): total build 1–1.5 mm, about 0.8–1.2 kg/m²/coat. Purpose: final texture and colour. Cure between coats: 3–6 hours; de‑dust lightly before the second pass.
  5. Sealer system (PU or polyaspartic, UV‑stable): 2–3 coats at 8–12 m²/L/coat. Purpose: weather and stain defence with high abrasion resistance. Cure per coat: 12–24 hours; wait 48–72 hours before light use.

Details that separate pros from callbacks: run the membrane 50–100 mm upstands along walls and posts; install drip edges on exposed perimeters to throw water clear. Observe tight weather rules: apply only at 10–25°C, RH < 80%, with zero rain or dew on the forecast; screen off gusts to prevent pinholes. Perform quality checks per layer — uniform film, no pooling, no voids — and lightly de‑dust between coats for mechanical bite. One‑line kit list to keep you honest: outdoor primer, liquid membrane, mesh, microcement (base/finish), UV‑stable sealer, masking, rollers, trowels.

Design for Outdoors: Colours, Textures, and Safe Non‑Slip Finishes

Outdoor microcement needs a look that wins in sunshine and downpours, without frying your feet or turning slick after rain. Go with a smart colour strategy: pick mid‑light greys or beiges to manage heat and cut glare; skip very dark tones in full sun. Prioritise UV stability with lightfast pigments and steer clear of shades known to fade. Lock in a consistent texture that suits how the space is used: light‑burnished for subtle movement, fine‑stone for a gently pitted grip, or a broomed effect for soft traction lines. Hit the right slip resistance numbers: R10 for general patios, R11 for pool surrounds and steps—and always verify with supplier test data. To boost grip where it matters, add 100–200 g/m² of fine silica or polymer beads into the first sealer coat and back‑roll evenly. Split zones by function: a smoother dining area for easy chair movement, with higher‑grip step noses and pool edges. Nail the finishing by specifying neat terminations at thresholds, drain grates, and posts, plus colour‑matched mastics at joints so the whole surface reads clean and intentional.

  1. Colour picks that work: choose mid‑light greys or beiges to tame heat and glare; avoid dark tones in full exposure. Use lightfast pigments for UV stability.
  2. Texture options: select one and keep it consistent—light‑burnished (refined movement), fine‑stone (pitted grip), or broomed effect (soft traction lines).
  3. Slip‑resistance targets: R10 for patios; R11 for pools and steps. Confirm with lab reports from your supplier.
  4. Add grip where needed: blend 100–200 g/m² silica or polymer beads into the first sealer, then back‑roll for even distribution.
  5. Zone‑led finishes: smoother dining zones; higher‑grip step noses and pool edges. Mark these on your layout plan.
  6. Example palettes: Coastal patio—light oat + fine‑stone texture + R11 around hose points. Urban balcony—cool grey + light‑burnished + matte sealer to reduce glare. Pool surround—warm mid‑grey + soft broomed arcs + contrasting step edge strip.
  7. Edges and details: specify threshold trims, tidy drain interfaces, and colour‑matched mastics for movement joints.

Install with Confidence: Timeline, Tools, and When to Hire a Pro

Dial in a clean workflow and you’ll avoid the classic outdoor facepalms. Keep a tight tools shortlist: mixing paddle, steel and rubber trowels, gauge rake, spiked roller for membrane, hawk, short-nap rollers, masking tape and sheeting, moisture meter, plus PPE (mask, gloves, knee pads). Stick to a predictable installation timeline for a 20 m² patio with a dry forecast: Day 1 AM mask and prime, PM first waterproofing membrane; Day 2 AM second membrane, PM base coat with mesh; Day 3 AM second base/levelling pass if needed, PM finish coat 1; Day 4 AM finish coat 2, PM sealer coat 1; Day 5 AM sealer coat 2 then protect from traffic for 48–72 hours. Make smart weather calls: postpone if rain could hit within 24 hours of sealing, and avoid direct sun while applying—work in shade bands to keep edges wet. Manage thickness control at a true 2–3 mm using reference shims at the edges, and carry movement joints through with neat saw cuts and a flexible sealant after curing. Before handover, run quick snag checks: consistent sheen, no telegraphed mesh, water beads on the surface, and drains free and flush.

DIY vs pro? Be honest. If the substrate has cracks wider than hairline, the area exceeds 30 m², there are complex multi-direction falls, it’s a pool surround, or you don’t have proper RH/moisture testing tools—bring in a specialist. Case study: a coastal terrace in Brighton (28 m²) followed the five-day sequence with strict shade-banding and shims; result: uniform 2.5 mm microcement, crisp joints, and zero blistering after a stormy week. Another case: a 42 m² courtyard in Bristol with intersecting falls and hairline-to-3 mm substrate cracks—client hired a pro who stitched the slab, used a high-solids membrane, and reinstated joints with flexible sealant; outcome: bead-forming water repellency, even UV-stable sealer finish, and no telegraphing. Keep it methodical, protect the cure, and your waterproof microcement patio will look sharp and stay that way.

Keep It Looking New: Care, Lifespan, and Smart Budgeting

Want your waterproof microcement terrace to stay sharp and tough? Keep a tight, simple routine: sweep weekly to stop grit acting like sandpaper; wash monthly with a pH‑neutral cleaner; skip harsh solvents and keep pressure washers at a safe distance. UK seasons bring quirks—fit rubber feet under furniture in winter, ditch rock salt and use grit or CMA de‑icer. Plan a reseal every 24–36 months outdoors (busy patios may need sooner): deep clean, lightly abrade, then apply 1–2 fresh coats of UV‑stable sealer. Spills happen—oil or wine? Blot within 15 minutes, wash with a neutral cleaner. Stop plant-pot rings by using risers so water doesn’t stew underneath. For fixes: hairline cracks—clean, micro‑fill with colour‑matched paste, then reseal the panel. Spot structural movement or recurring cracks? Bring in a pro and reassess joints and substrate. With good drainage and periodic sealing, you’re looking at a 10–15 year lifespan and better colour hold under sun with UV‑stable sealers. Keep the paperwork tight—batch numbers, moisture readings, weather notes, photos—gold dust for warranty claims and future touch‑ups.

Budget smart, not timid. Installed projects in the UK typically land at £90–160/m² depending on prep, complexity, and sealer system. DIY? Materials run about £25–45/m², then factor add‑ons: waterproofing +£8–15/m², slip additive +£1–2/m², custom colour +£2–4/m², with edge trims priced per metre. The trick to stretching value is simple: don’t under‑spec the sealer, control drainage, and commit to a fast, regular clean. That keeps stains shallow, reduces rework, and pushes reseal intervals closer to the 36‑month mark. Below is a quick, real‑world comparison to benchmark choices.

Option Upfront Cost (UK) Typical Reseal Slip Resistance Lifespan (with care) Best Use
Installed Microcement (Pro) £90–160/m² 24–36 months R9–R11 (with additive) 10–15 years Premium patios, outdoor kitchens, stairs
DIY Microcement (Materials) £25–45/m² (+ waterproofing & add‑ons) 24–30 months (depends on prep) R9–R11 (with additive) 8–12 years Small terraces, feature zones, budget refresh
Porcelain Pavers (Alt) £40–80/m² (+ install) None (grout/seal joints as needed) R10–R12 (rated) 15–20 years Low‑maintenance, high traffic, traditional look
Natural Stone (Alt) £60–120/m² (+ sealing) 12–24 months Varies by finish 15–25 years Character patios, heritage settings

Need microcement? Go to: https://www.festfloor.com/

read more
Movers

When Gym Equipment Movers Los Angeles Become Your Unexpected Workout Partners

You love your gym gear. The dumbbells, the treadmill, the rower that makes you feel like a Viking on a river, all of it. But now, it’s time to move. And moving this stuff isn’t exactly like shifting a stack of books. With Los Angeles gym equipment moving experts, you skip the drama of jammed doors and “oops” dents in the wall. Visit https://beezeemovers.com/fitness-equipment-movers-in-los-angeles and you’ll see how real pros handle it. They’ve got the muscle, the technique, and the knack for making even your stubborn elliptical behave. Think of them as your moving-day spotters, ready to keep every lift safe.

Lifting More Than Just Your Machines and Your Stress

You could rope in friends to help. Sure. But you know how that goes, someone shows up late, another “forgets” their gloves, and suddenly you’re bribing people with pizza. Professionals? They show up with straps, dollies, and actual know-how. They move each piece like it’s precious cargo. And they do it without leaving you sore for a week.

This is where hiring movers for gym gear is like hiring a personal trainer. You’re paying for expertise, safety, and efficiency. You don’t just get stuff moved, you get peace of mind. Plus, you won’t have to deal with the awkward moment when a friend drops your $2,000 spin bike and mutters, “It’s fine… it’s just cosmetic.”

Seven small wins that make hiring pros worth it:

  • No broken mirrors or cracked tiles.
  • Machines wrapped and protected like fine art.
  • Floors guarded from scuffs and scratches.
  • Heavy lifting done without complaints.
  • Everything labeled for easy reassembly.
  • Tight spaces handled with confidence.
  • Moving day finished without drama.

That’s not just a checklist. It’s a promise that moving doesn’t have to be a circus. And let’s be honest, if you wanted to be part of a circus, you’d have joined one instead of building a home gym.

Why Your Gear Deserves a First-Class Trip

That bench press has been with you through every personal best. Your treadmill’s logged more miles than your car. This stuff is more than metal and bolts, it’s part of your story. Professionals get that. They don’t toss your gear around like it’s scrap. They treat it with respect.

They’ll take it apart when needed, protect every piece, and put it back together so it’s ready for action. No mystery screws left over. No “we’ll figure it out later” or “where does this doodad go again.” Just your gym, exactly how you like it, but in its new home. And without you having to ice your lower back for the next three days while binge-watching penguin documentaries.

When Moving Day Feels Like a Training Session You Actually Enjoy

With the right crew, moving day can feel surprisingly smooth. You won’t be juggling heavy loads or holding your breath every time a machine rounds a corner. Instead, you’ll be watching people who clearly know the rhythm of the job.

They’ll coordinate, communicate, and keep things moving (pun fully intended). And you? You’ll be free to plan where everything goes, maybe even sip a coffee while they work. You’ll still get the satisfaction of seeing your space come together, without the back strain or the muttered regrets about not hiring help sooner.

In the end, it’s about letting specialists do what they do best so you can focus on what you do best, getting back to your workouts without missing a beat. Your gear stays safe, your new space gets set up fast, and you’re ready to lift, run, or row like nothing ever happened. Also, bonus perk, you get to brag to your gym buddies about how you moved everything without breaking a sweat… or a friendship.

read more
Bedroom

Designing a Small Bedroom to Maximise Space

In contemporary urban living, the challenge of designing small spaces, particularly bedrooms, is a common dilemma that affects a significant portion of the population. Limited square footage often necessitates innovative design solutions that not only address functional needs but also cater to aesthetic considerations. When approaching the task of optimizing a small bedroom, various strategies—ranging from spatial planning and storage solutions to the manipulation of colours and materials—can be employed to create a harmonious balance between comfort, utility, and visual appeal. This essay will explore key design principles that can effectively maximize space in a small bedroom, thereby enhancing both its functionality and liveability. A storage bed with drawers can fulfil all of these needs.

The first step in creating an effective small bedroom layout is to conduct a thorough analysis of the available space. This includes taking precise measurements and understanding the placement of windows, doors, and electrical outlets. Utilizing a floor plan can facilitate a clear visualization of the space and allow for creative arrangements of furniture. Utilizing multifunctional furniture—such as beds with built-in drawers, collapsible desks, or nightstands that double as storage units—can significantly reduce clutter and maintain an open feel within the room. Additionally, the placement of furniture should prioritize flow; avoiding obstructive layouts can create an illusion of a larger area and enhance accessibility, making the bedroom feel more expansive.

The effective use of vertical space is another critical component in maximizing a small bedroom. By incorporating vertical storage solutions, such as wall-mounted shelves or tall bookcases, one can draw the eye upward and divert attention from the limited floor area. This not only increases storage capacity but also contributes to an overall sense of spaciousness. Furthermore, hooks or pegboards can be used to organize accessories and clothing, freeing up valuable drawer space. Incorporating elements like floating shelves or ladder-style shelving can also introduce aesthetic appeal while maintaining practicality. When accomplished thoughtfully, vertical storage can be both a solution to space constraints and a design feature that adds character to the room.

Colour and light play essential roles in dictating the perceived size of a space. Light hues, particularly whites, soft pastels, or cool greys, can create an airy atmosphere and reflect natural light, further enhancing the illusion of spaciousness. When applying colour, it is advisable to use a monochromatic palette, as this reduces visual fragmentation. Additionally, strategic use of mirrors can effectively double the perception of space. A well-placed mirror not only reflects light but can also create depth, making a small bedroom feel larger than its actual dimensions. The introduction of adequate lighting—through both natural and artificial means—contributes to this effect; layering ambient, task, and accent lighting can create a dynamic yet cozy environment.

Moreover, personalization can be harmoniously integrated into the design without sacrificing space. Subtle decorative elements such as artwork, textiles, or indoor plants can add warmth and individuality while also serving functional purposes. For instance, textiles can be used to introduce texture and comfort without overwhelming the room, while plants improve air quality and add a touch of nature. The careful selection of decor that complements the room’s overall design can enhance visual interest without encroaching on usable space. In this regard, minimalism often serves as an advantageous design philosophy; simplicity can lead to elegance, allowing the room’s design to feel intentional and curated rather than haphazard.

In conclusion, designing a small bedroom to maximize space requires a thoughtful interplay of strategic planning, spatial efficiency, and aesthetic considerations. By incorporating multifunctional furniture, utilizing vertical storage solutions, manipulating colour and light, and personalizing decor, one can create a small bedroom that is not only functional but also inviting. The challenge of limited space can, in fact, invoke creativity and innovation, leading to interiors that reflect personal style while maintaining a sense of openness and tranquillity. As urban living continues to evolve, the principles outlined in this essay will remain ever relevant, championing the idea that even the smallest bedrooms can be transformed into personal sanctuaries of comfort and style.

read more
1 2 3 6
Page 1 of 6