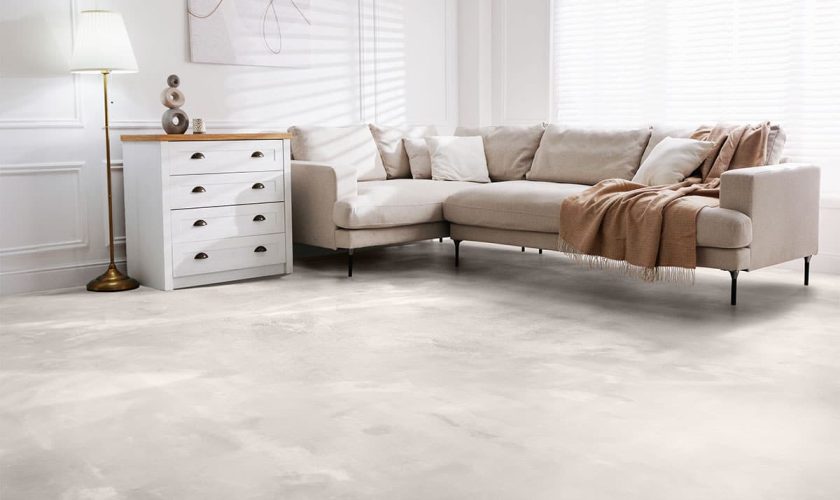
When Laura transformed her rain-soaked patio into a seamless, slip‑resistant terrace with waterproof microcement, she didn’t just gain an elegant outdoor room—she unlocked year‑round usability, cleaner lines around drains and thresholds, and a durable finish that shrugs off British weather. This guide shows you how to achieve the same: from planning falls, drainage routes and substrate checks, to building a proven waterproof layer system with correct cure windows; from selecting UV‑stable colours, textures and non‑slip finishes that suit dining zones, paths, balconies and pool surrounds, to a clear installation workflow, tools list and when to call a specialist. You’ll also find practical care routines, repair tips, realistic UK costs and resealing schedules, helping you create a safe, beautiful, long‑lasting outdoor surface with confidence—backed by transparent methods and quality controls for results you can trust.
Plan the Perfect Outdoor Microcement Setup: Site, Substrate, Drainage
You don’t get a second shot with exterior finishes, so map the space like a pro. Start by splitting the area into clear use zones—dining, lounging, paths, and pool surrounds—then sketch a scaled plan with accurate m² measurements. Next, verify surface falls using a level and aim for a reliable 1.5–2% slope leading away from the building; for example, a 4 m depth needs a 60–80 mm drop. Don’t guess where water goes—map water exit points (think linear drains, soakaways, gulleys) and confirm they can actually cope during heavy rain. Then interrogate the substrate: identify cracks, hollow sounds, or loose tiles, and ensure you’re on a rigid base such as concrete, screed, or stable tiles—not timber. Log moisture readings (RH ≤ 75% for screeds unless the system says otherwise), and note the date—installers and warranties love records. Mark every movement/expansion joint and plan to honour or mirror them in the microcement finish to prevent telegraphing. Finally, clock the exposures—full sun, shade, wind—because they determine colour choice, curing schedule, and even sealer selection for a truly waterproof microcement result.
Case studies that nail the brief: • 8 m² balcony (single fall) • 20 m² patio (dual fall + linear drain) • 35 m² pool surround (perimeter falls to channel). In practice, that means precise gradient control, correct drain placement, and a verified substrate integrity checklist before any basecoat goes down. This is how you achieve a durable, slip-resistant, and genuinely low-maintenance outdoor microcement floor that looks sharp and survives British weather without sulking at the first downpour.
Build a Reliable Waterproof System: Layers, Coverage, and Curing Windows
For a bulletproof outdoor install, commit to one manufacturer’s complete waterproof system from primer to sealer — mixing brands is how projects fail. Below is a tight, field-tested stack for waterproof microcement outdoors, with timings that keep momentum without risking delamination. Work clean, and respect the curing windows; cutting corners shows up later as blisters, chalking or edge failures.
- Primer (outdoor-rated): 1 coat at roughly 8–12 m²/L. Purpose: adhesion promotion on concrete, screed, or stable tiles. Minimum cure to next step: 2–4 hours.
- Liquid waterproof membrane: 2 coats, each at about 1.0–1.5 m²/kg/coat. Purpose: block water ingress and bridge hairline movement. Minimum cure: 12–24 hours before reinforcement.
- Base coat + mesh reinforcement: 1–1.5 mm with alkali‑resistant mesh embedded, coverage around 1.0–1.5 kg/m². Purpose: control micro‑cracking and stabilise the field. Minimum cure: 3–6 hours.
- Finish microcement (2 coats): total build 1–1.5 mm, about 0.8–1.2 kg/m²/coat. Purpose: final texture and colour. Cure between coats: 3–6 hours; de‑dust lightly before the second pass.
- Sealer system (PU or polyaspartic, UV‑stable): 2–3 coats at 8–12 m²/L/coat. Purpose: weather and stain defence with high abrasion resistance. Cure per coat: 12–24 hours; wait 48–72 hours before light use.
Details that separate pros from callbacks: run the membrane 50–100 mm upstands along walls and posts; install drip edges on exposed perimeters to throw water clear. Observe tight weather rules: apply only at 10–25°C, RH < 80%, with zero rain or dew on the forecast; screen off gusts to prevent pinholes. Perform quality checks per layer — uniform film, no pooling, no voids — and lightly de‑dust between coats for mechanical bite. One‑line kit list to keep you honest: outdoor primer, liquid membrane, mesh, microcement (base/finish), UV‑stable sealer, masking, rollers, trowels.
Design for Outdoors: Colours, Textures, and Safe Non‑Slip Finishes
Outdoor microcement needs a look that wins in sunshine and downpours, without frying your feet or turning slick after rain. Go with a smart colour strategy: pick mid‑light greys or beiges to manage heat and cut glare; skip very dark tones in full sun. Prioritise UV stability with lightfast pigments and steer clear of shades known to fade. Lock in a consistent texture that suits how the space is used: light‑burnished for subtle movement, fine‑stone for a gently pitted grip, or a broomed effect for soft traction lines. Hit the right slip resistance numbers: R10 for general patios, R11 for pool surrounds and steps—and always verify with supplier test data. To boost grip where it matters, add 100–200 g/m² of fine silica or polymer beads into the first sealer coat and back‑roll evenly. Split zones by function: a smoother dining area for easy chair movement, with higher‑grip step noses and pool edges. Nail the finishing by specifying neat terminations at thresholds, drain grates, and posts, plus colour‑matched mastics at joints so the whole surface reads clean and intentional.
- Colour picks that work: choose mid‑light greys or beiges to tame heat and glare; avoid dark tones in full exposure. Use lightfast pigments for UV stability.
- Texture options: select one and keep it consistent—light‑burnished (refined movement), fine‑stone (pitted grip), or broomed effect (soft traction lines).
- Slip‑resistance targets: R10 for patios; R11 for pools and steps. Confirm with lab reports from your supplier.
- Add grip where needed: blend 100–200 g/m² silica or polymer beads into the first sealer, then back‑roll for even distribution.
- Zone‑led finishes: smoother dining zones; higher‑grip step noses and pool edges. Mark these on your layout plan.
- Example palettes: Coastal patio—light oat + fine‑stone texture + R11 around hose points. Urban balcony—cool grey + light‑burnished + matte sealer to reduce glare. Pool surround—warm mid‑grey + soft broomed arcs + contrasting step edge strip.
- Edges and details: specify threshold trims, tidy drain interfaces, and colour‑matched mastics for movement joints.
Install with Confidence: Timeline, Tools, and When to Hire a Pro
Dial in a clean workflow and you’ll avoid the classic outdoor facepalms. Keep a tight tools shortlist: mixing paddle, steel and rubber trowels, gauge rake, spiked roller for membrane, hawk, short-nap rollers, masking tape and sheeting, moisture meter, plus PPE (mask, gloves, knee pads). Stick to a predictable installation timeline for a 20 m² patio with a dry forecast: Day 1 AM mask and prime, PM first waterproofing membrane; Day 2 AM second membrane, PM base coat with mesh; Day 3 AM second base/levelling pass if needed, PM finish coat 1; Day 4 AM finish coat 2, PM sealer coat 1; Day 5 AM sealer coat 2 then protect from traffic for 48–72 hours. Make smart weather calls: postpone if rain could hit within 24 hours of sealing, and avoid direct sun while applying—work in shade bands to keep edges wet. Manage thickness control at a true 2–3 mm using reference shims at the edges, and carry movement joints through with neat saw cuts and a flexible sealant after curing. Before handover, run quick snag checks: consistent sheen, no telegraphed mesh, water beads on the surface, and drains free and flush.
DIY vs pro? Be honest. If the substrate has cracks wider than hairline, the area exceeds 30 m², there are complex multi-direction falls, it’s a pool surround, or you don’t have proper RH/moisture testing tools—bring in a specialist. Case study: a coastal terrace in Brighton (28 m²) followed the five-day sequence with strict shade-banding and shims; result: uniform 2.5 mm microcement, crisp joints, and zero blistering after a stormy week. Another case: a 42 m² courtyard in Bristol with intersecting falls and hairline-to-3 mm substrate cracks—client hired a pro who stitched the slab, used a high-solids membrane, and reinstated joints with flexible sealant; outcome: bead-forming water repellency, even UV-stable sealer finish, and no telegraphing. Keep it methodical, protect the cure, and your waterproof microcement patio will look sharp and stay that way.
Keep It Looking New: Care, Lifespan, and Smart Budgeting
Want your waterproof microcement terrace to stay sharp and tough? Keep a tight, simple routine: sweep weekly to stop grit acting like sandpaper; wash monthly with a pH‑neutral cleaner; skip harsh solvents and keep pressure washers at a safe distance. UK seasons bring quirks—fit rubber feet under furniture in winter, ditch rock salt and use grit or CMA de‑icer. Plan a reseal every 24–36 months outdoors (busy patios may need sooner): deep clean, lightly abrade, then apply 1–2 fresh coats of UV‑stable sealer. Spills happen—oil or wine? Blot within 15 minutes, wash with a neutral cleaner. Stop plant-pot rings by using risers so water doesn’t stew underneath. For fixes: hairline cracks—clean, micro‑fill with colour‑matched paste, then reseal the panel. Spot structural movement or recurring cracks? Bring in a pro and reassess joints and substrate. With good drainage and periodic sealing, you’re looking at a 10–15 year lifespan and better colour hold under sun with UV‑stable sealers. Keep the paperwork tight—batch numbers, moisture readings, weather notes, photos—gold dust for warranty claims and future touch‑ups.
Budget smart, not timid. Installed projects in the UK typically land at £90–160/m² depending on prep, complexity, and sealer system. DIY? Materials run about £25–45/m², then factor add‑ons: waterproofing +£8–15/m², slip additive +£1–2/m², custom colour +£2–4/m², with edge trims priced per metre. The trick to stretching value is simple: don’t under‑spec the sealer, control drainage, and commit to a fast, regular clean. That keeps stains shallow, reduces rework, and pushes reseal intervals closer to the 36‑month mark. Below is a quick, real‑world comparison to benchmark choices.
| Option | Upfront Cost (UK) | Typical Reseal | Slip Resistance | Lifespan (with care) | Best Use |
| Installed Microcement (Pro) | £90–160/m² | 24–36 months | R9–R11 (with additive) | 10–15 years | Premium patios, outdoor kitchens, stairs |
| DIY Microcement (Materials) | £25–45/m² (+ waterproofing & add‑ons) | 24–30 months (depends on prep) | R9–R11 (with additive) | 8–12 years | Small terraces, feature zones, budget refresh |
| Porcelain Pavers (Alt) | £40–80/m² (+ install) | None (grout/seal joints as needed) | R10–R12 (rated) | 15–20 years | Low‑maintenance, high traffic, traditional look |
| Natural Stone (Alt) | £60–120/m² (+ sealing) | 12–24 months | Varies by finish | 15–25 years | Character patios, heritage settings |
Need microcement? Go to: https://www.festfloor.com/